Traverse Global v11.2 - Service Repair
PO Receiving/Invoicing Cost Difference
When you create a job, you can link a purchase order to that job if you interface PO with SR. When transactions are linked (you can see this by using Source Link button on PO trans), and if there is a difference between the receiving cost of the PO and the invoicing cost of the PO, that cost difference will transfer to the job using WIP accounts, and appear on the detail tab of the job transaction.
Each invoice cost difference record will create a new line item record on the detail tab. The additional cost record will include text in the description field only with an item equal to (Original Item ID) - Addl PO Inv Cost.
Note: The item ID field is not being used, so quantities will not be affected for that item.
Material Burden will also be calculated for the additional cost. The Material WIP and Material Burden WIP accounts from the SR distribution code assigned to the department on the job transaction will be used for the additional costs.
The item's price is calculated as follows:
- If the PO item comes back from the pricing engine with a price, the item's price on the additional cost line will be zero.
- If department multipliers were used to set the PO item price on the detail tab, then the multipliers are used for the additional cost line.
Note: If the price equals 0, then the price is calculated using the department multiplier x unit cost.
Workflow Example:
Before you start, ensure the PO business rule for transaction link is set to 'Yes' to allow the link to update. Also, make sure the Generate Purchase from Service Repair rule is not set to 'None'.
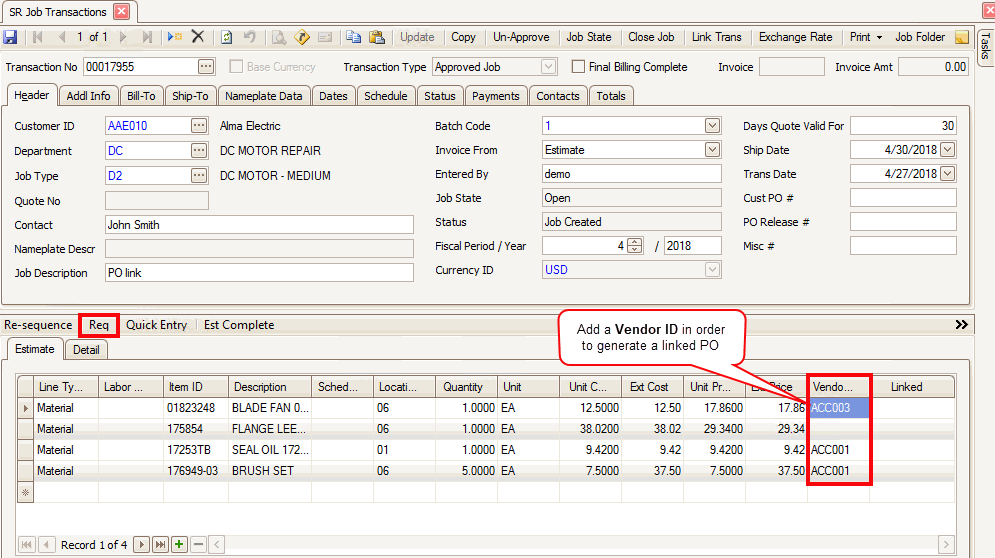
- Create a Job Transaction. Add a Vendor ID to a material line so you can generate a Purchase Order that is linked to the job.
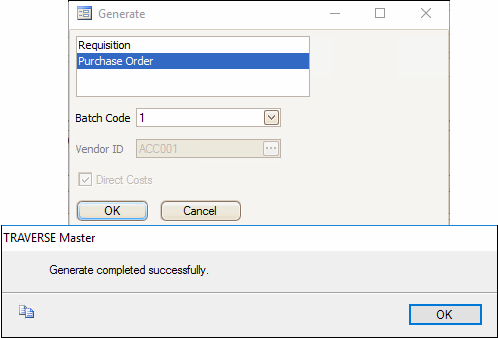
- Link a PO to the job by pressing the Req button to open the Generate PO window. Generate a purchase order for each vendor selected.
- You can verify the item is linked to a PO by toggling to show the detail view, or adding the Linked field to the grid using the Column Chooser.

- Double-click on the Linked hyperlink to open the PO Transaction Information window and view the linked PO.
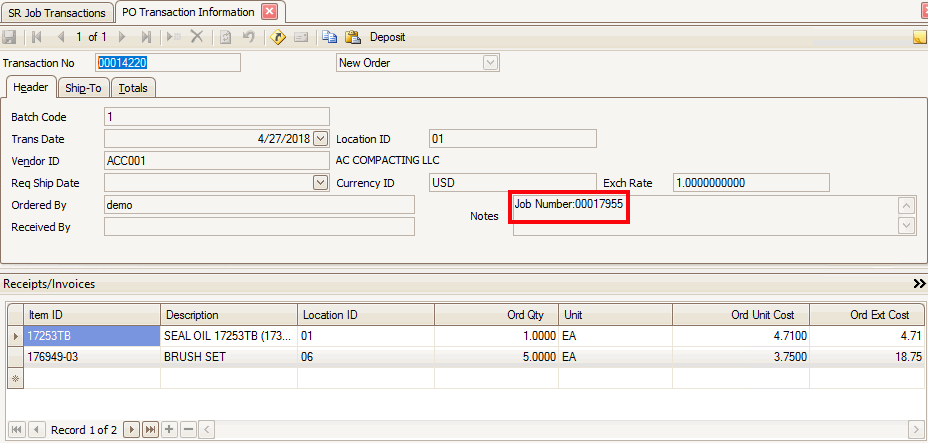
- Open the PO transaction and receive the item(s). Note the Unit Cost.

- Return to the job transaction screen and select the job transaction to which the PO is linked. Click the Update button to unlock the job for updating. A notification window appears to let you know that the linked quantities have been updated. If you do not see the notification, refresh the data (
 ) for your job.

- The items from the linked PO will appear on the Detail tab of the job. Note the Unit Cost.
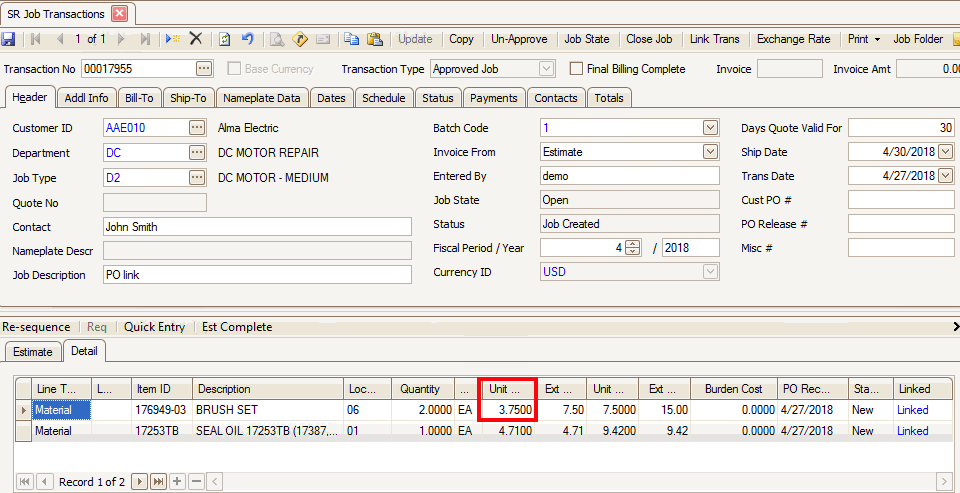
- After reviewing the SR material charges, post material charges using the SR Post Transactions function.
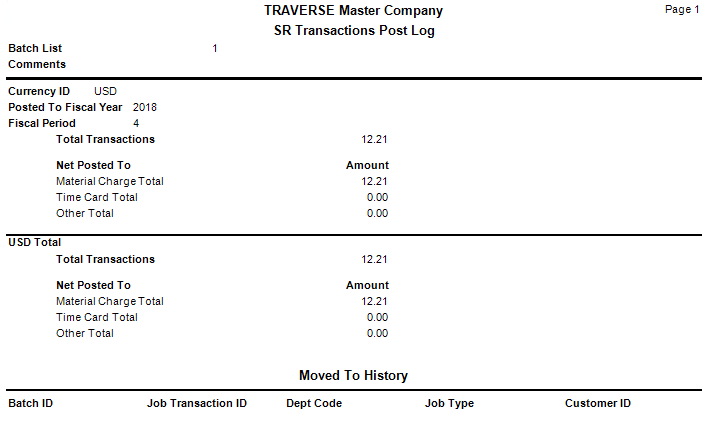
- Enter an invoice for the PO with a different cost for the item.

- Return to the job transaction screen and select the job transaction to which the PO is linked. Click the Update button to unlock the job for updating. A notification window appears to let you know that the linked quantities have been updated. If you do not see the notification, refresh the data (
 ) for your job.

- A new line for each additional cost from the linked PO will appear on the Detail tab of the job. Note the unit cost equals the cost difference between the receipt cost and the invoice cost.
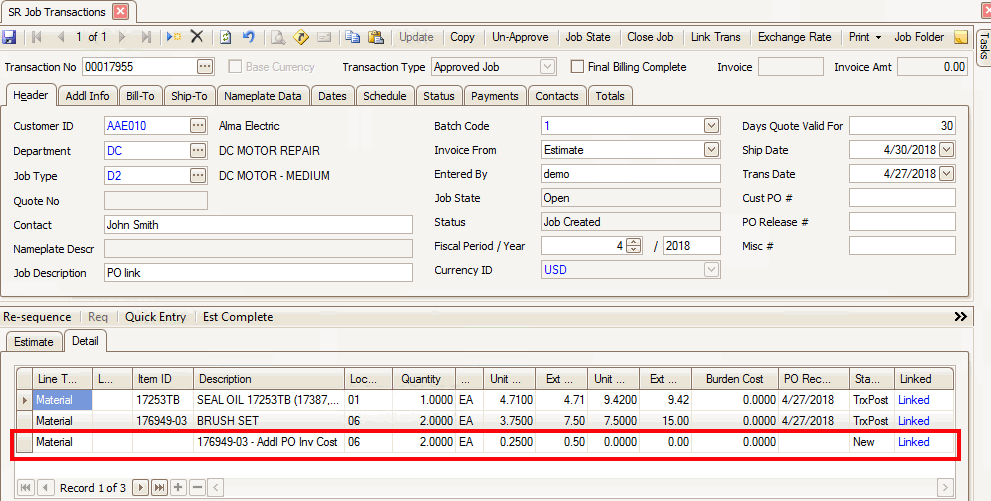
- Additional receipts will be added to the detail tab.

- Keep going:
- Post material charges.
- Enter invoice(s) for additional receipt(s).
- Return to job transaction screen, select the linked job, and update the job transaction. A new line is created if necessary for additional cost information.

A new material line item record is created for each PO invoice cost difference record entered on the PO.